If you frequently shop online, you probably experienced receiving a product that didn’t quite look like its photo. Maybe it turned out smaller than you expected or flimsier than how it was depicted in its high-quality image. Regardless of the case, the actual product either disappoints you or astounds you.
Such is a challenge many e-business owners face. Multiple surveys reveal that most consumers consider product photos highly influential in their purchases. You can say that you’ve already succeeded when a customer orders your product because of its beautiful picture, but that can quickly backfire on you if they turn out to be unhappy with the actual appearance of your product.
But images are a vital element of your branding, so you can’t skimp on professional-quality photos. Hence, here are the ways to make your product images enticing, but not deceiving:
1. Take the Photos Yourself
Even if your suppliers have sent product photos that you can use, make the extra effort of photographing the products yourself. With the availability of smartphones and affordable DSLRs, you don’t need to spend a lot anymore for high-quality photos.
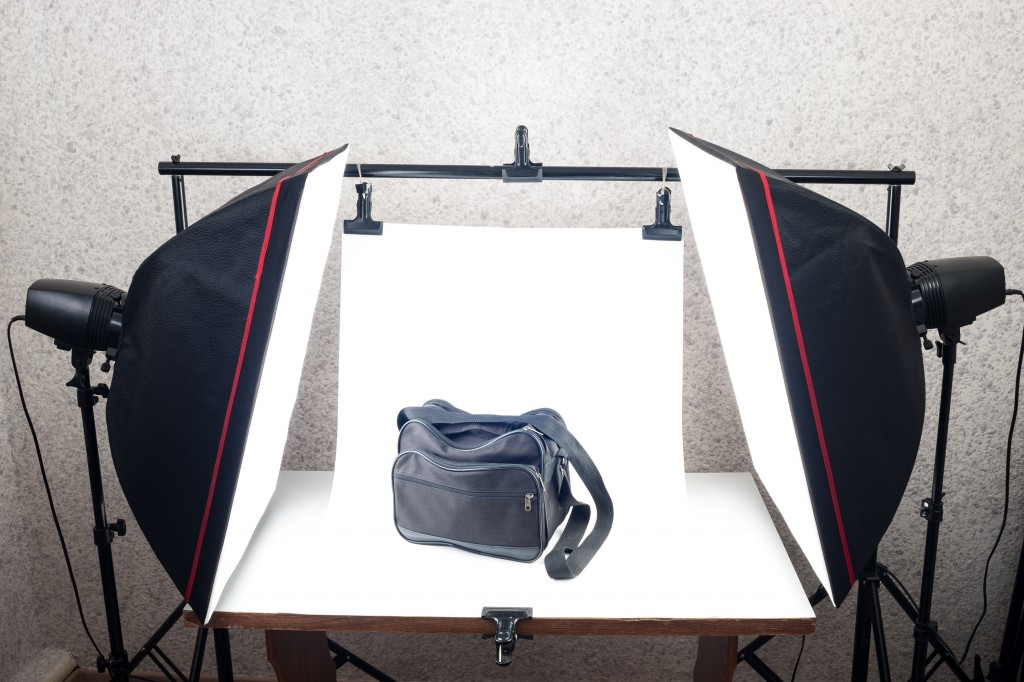
To take product-only images, prepare a white background and lighting equipment. Or, shoot in the daytime so you can rely on natural light instead of artificial ones. Select the highest resolution on your camera, and take photos from all angles.
Post in-context photos as well to let your customers see how the product looks when in use. Depending on what you’re selling, you might need to have a model pose while wearing or using the product.
2. Stress Accuracy
If you’re also peeved at your online purchases looking far from their photographs, then ensure that your own product photos won’t disappoint your customers. A few professional touch-ups are fine, especially if the flaws will compromise the quality of the images. That especially applies to small products like jewelry. Since you need to emphasize its brilliance, it couldn’t reflect unsightly objects. As such, you’d need professional high-end jewelry retouching services to present the product at its best.
When post-processing your product photos, note that you should only weed out the photo’s flaws, and not heavily edit your subject. Flaws include unnecessary accessories such as mannequins or busts, shadows, and inaccurate color depictions. Focus on correcting those, and test the results on multiple devices to see if the details are now accurately demonstrated.
3. Send Your Products to Bloggers/Vloggers

Utilize a blogger’s or vlogger’s influence to promote your product and to make its photos closer to reality. If a vlogger reviews your work in a video, their followers will have an in-depth look at it, helping them visualize thoroughly how your product looks like in real life.
This strategy proves useful because, according to research, people are more likely to remember a product when they hear information about it. But if that information is paired with a relevant photo, they’ll retain more details, potentially boosting your sales in turn.
4. Include Videos
34% of e-commerce retailers now use videos as a tool to drive sales, according to a survey by Econsultancy and Conversion. Hence, don’t just rely on vloggers to make videos about your product. Though only 36% of consumers report that videos influence their purchasing decisions, the medium remains vital, so don’t rule it out of your options.
Once your photos and videos are already posted, don’t forget to include detailed product descriptions. Demonstrating your products with complete details reduces risks of returns and disappointed customers. Instead, more people will remember your products, and you can expect their loyalty.